See the interface
FileLocker in action.
Six steps from your original file to a protected delivery your client can unlock in a supported browser — without installing FileLocker.
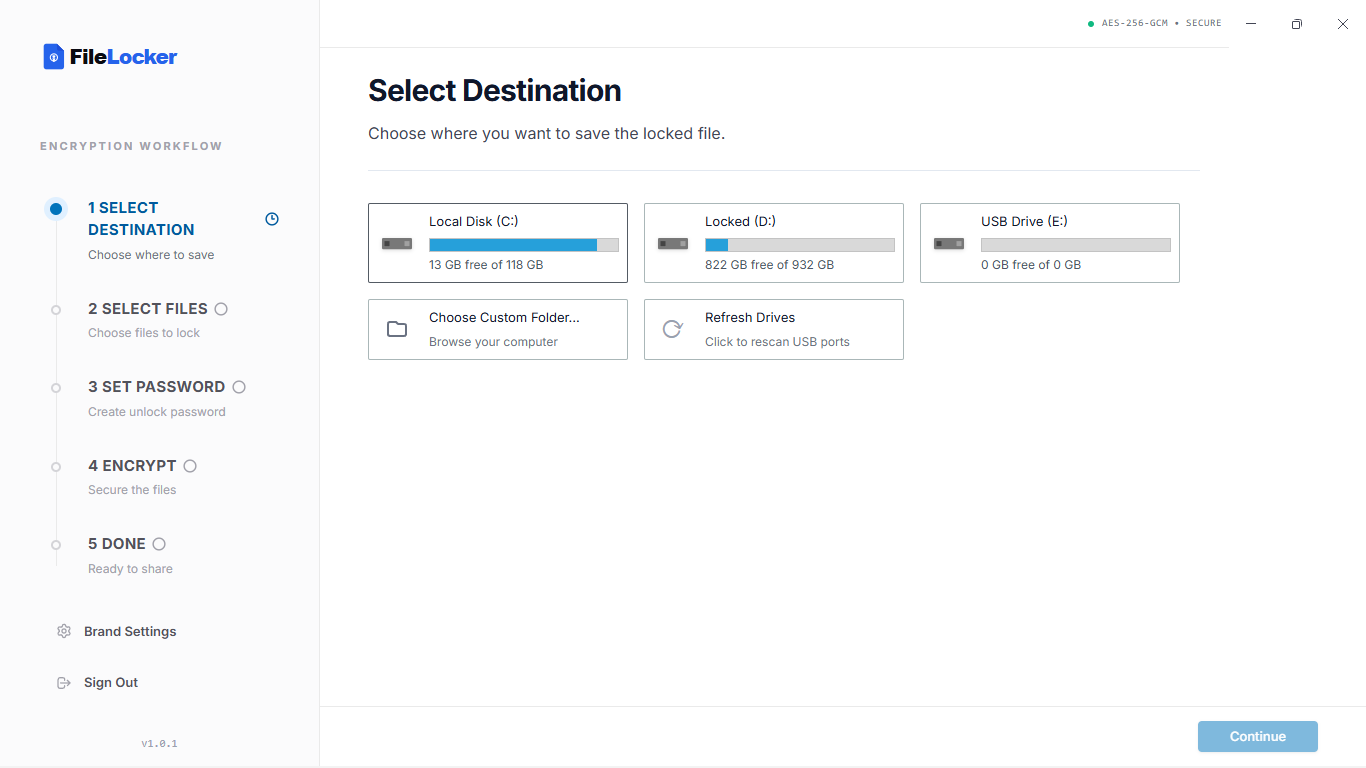
Open FileLocker and choose where you want to save the locked file: a USB drive, a local disk, or a custom folder on your computer. FileLocker shows all connected drives and their available space.
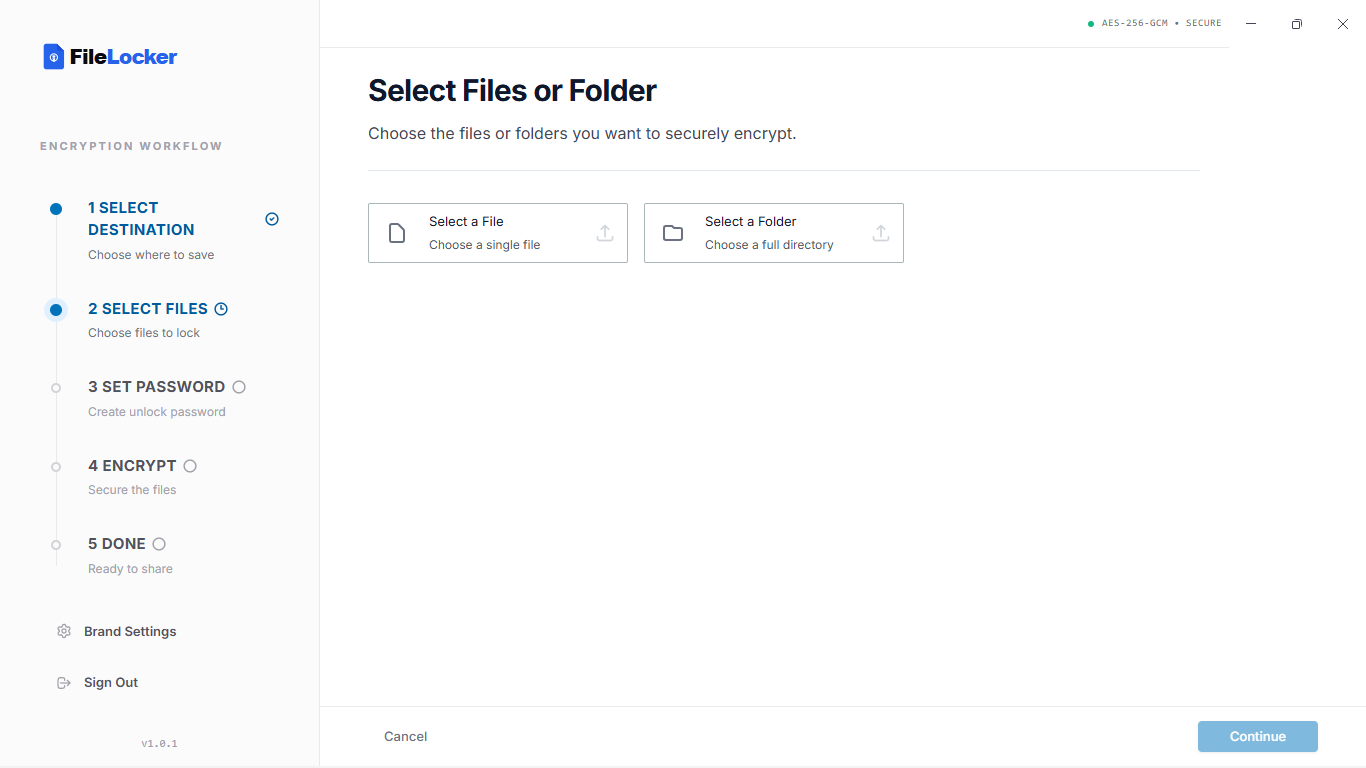
Browse to select an individual file or an entire folder. FileLocker supports a wide range of file types and folder structures.
Choose whether to hide the original file name inside the locked file. Optionally enable automatic deletion of the original file from your computer after locking completes.
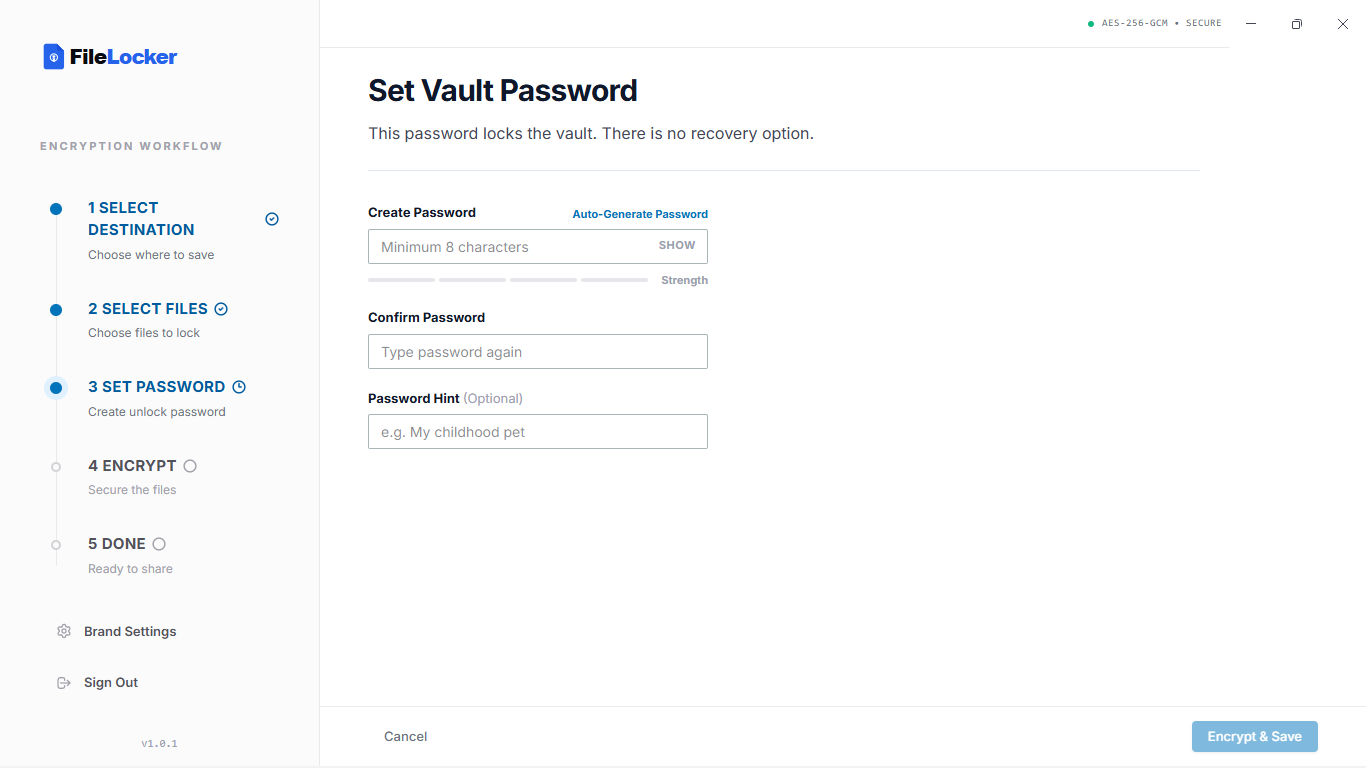
Create your own password or let FileLocker generate a strong, random one automatically. Optionally add a hint that will appear on the unlock screen to help your client remember — without revealing the password itself.
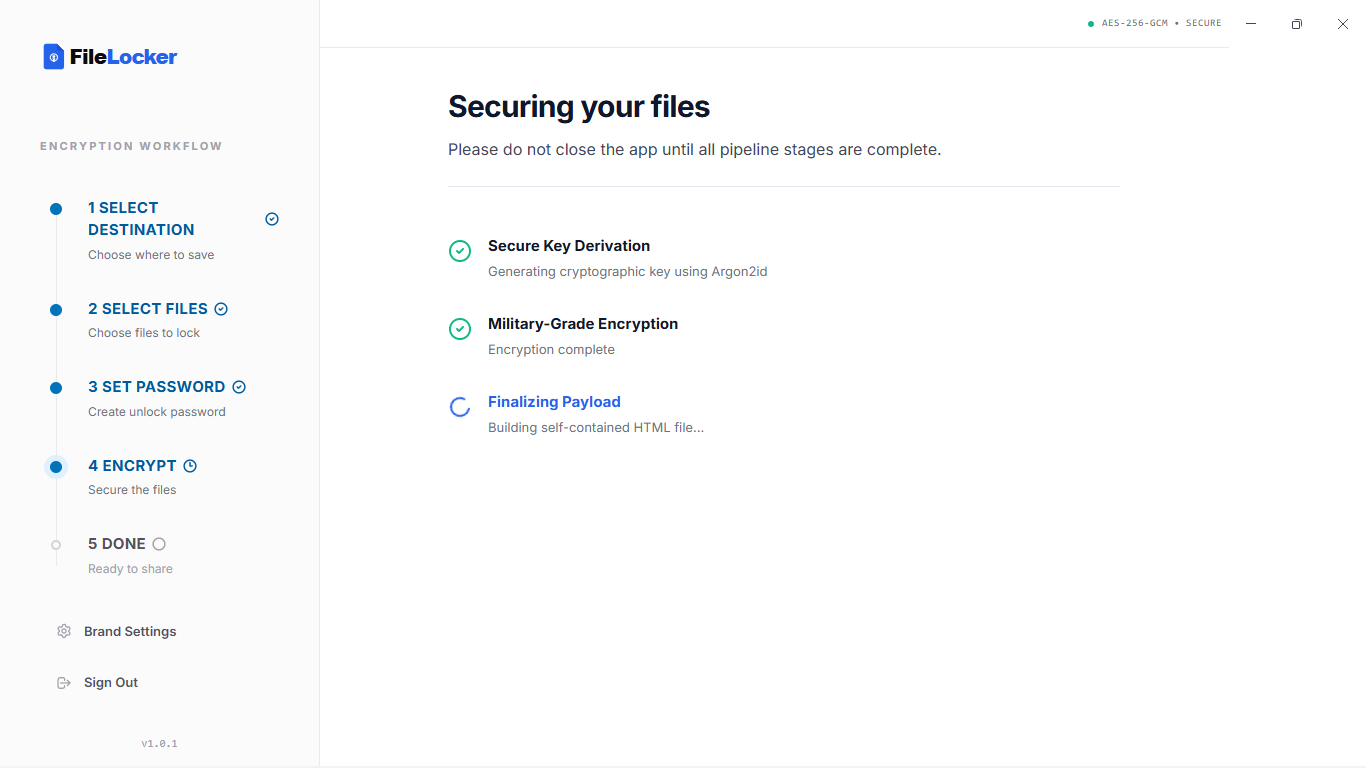
FileLocker processes your selected files locally using AES-256-GCM encryption and creates a self-contained locked file ready to deliver. The locking process does not require an internet connection.
Transfer the locked file to your client using the method that works best for your workflow: USB drive, email, file transfer, or another delivery method. The protection travels with the file, regardless of how it's delivered.
Your recipient doesn't need technical expertise to unlock the file.
Your client receives the locked file through whichever delivery method you used — USB drive, email, or another transfer method.
They open the locked file directly in Chrome, Edge, Safari, or Firefox. No additional software download. No account. No FileLocker installation.
They type the password you set. If you added a hint, it's displayed on the unlock screen. The file is decrypted inside their browser as part of the unlock process; the protected file does not need to be uploaded to a FileLocker server.
The recovered document is saved to their computer. They choose where to save it, and the process completes locally without requiring cloud storage.
Once your file is locked, the protection travels with the file. You can transfer the locked file using the method that works best for your workflow.
Write the locked file to a USB drive and hand it over in person. If the drive is lost, the contents remain completely unreadable without the password.
Attach the locked file to an email. The recipient still needs the password to unlock the protected file.
Transfer the locked file using the file-sharing or transfer service that fits your workflow.
FileLocker is currently available to selected professionals. Request access to get started.